In this tutorial we would be dealing with Google map and how to show a Google Map in your Application using Google Map API’s , in order to do so we would need the MapFragment class which extends the Fragment class and provides the life-cycle management and the services for displaying a GoogleMap widget. GoogleMap is the class which shows the map. The MapFragment has the getMap() method to access this class.
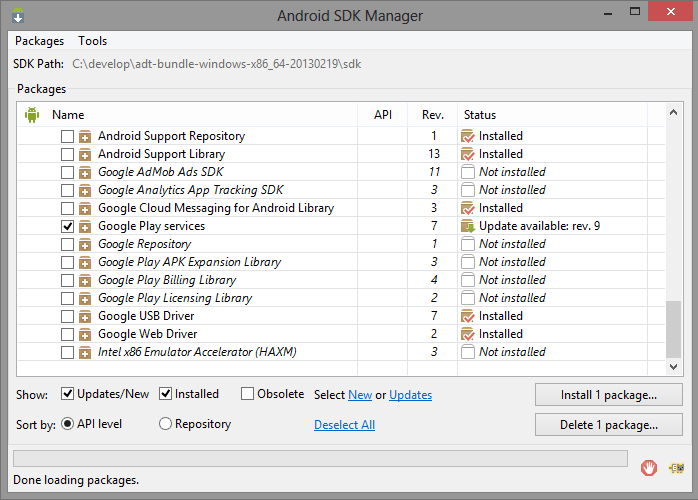
To use Google Maps in your Activity you need to install Google Play Services from the SDK manager as shown below :
Now you would need to Import the Google Play Services in your current working work-space , to do so (in eclipse) just go to top and click on FILE->Import->Android->Existing Android Code into Work-space and then click on Browse and then find where your Google-Play Services are , normally you would find them where your sdk is installed and there in extras and then in the Google directory then go to google_play_services and then google-play-services_lib this is the directory which you need to import, here is how it would like once you have imported the play services into your work-space :
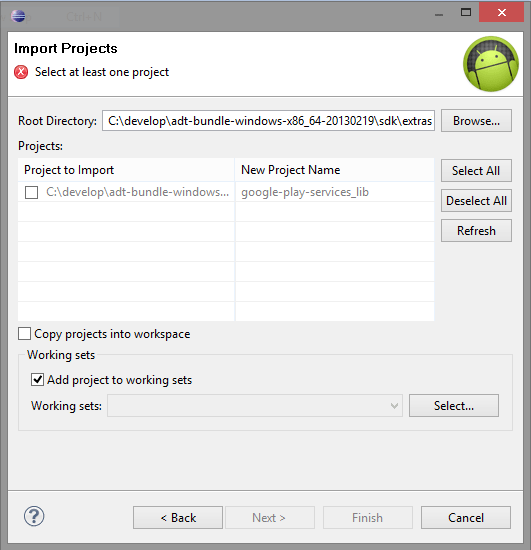
and once selecting the Project to be Imported click on next to continue.
Now the Google Play Services Library has been imported into your workspace , this contains all the methods that we would need in order to use Google Maps in our Application.
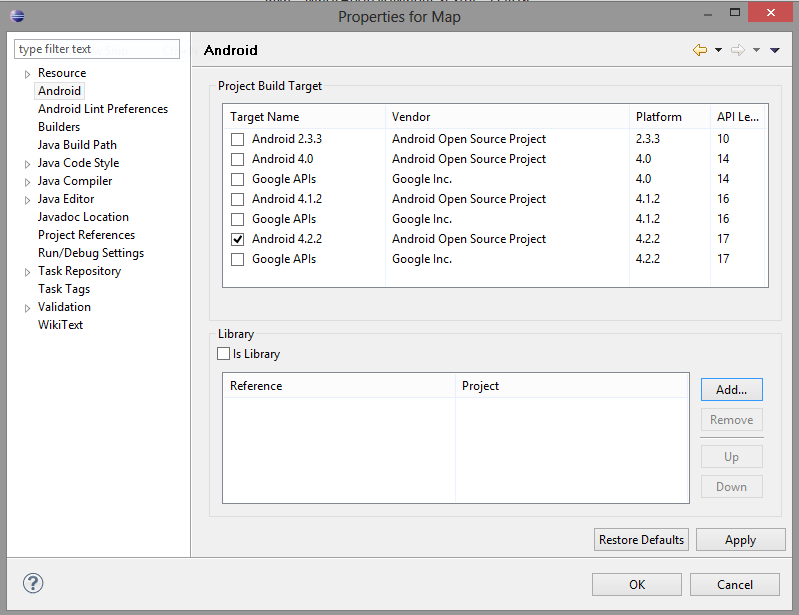
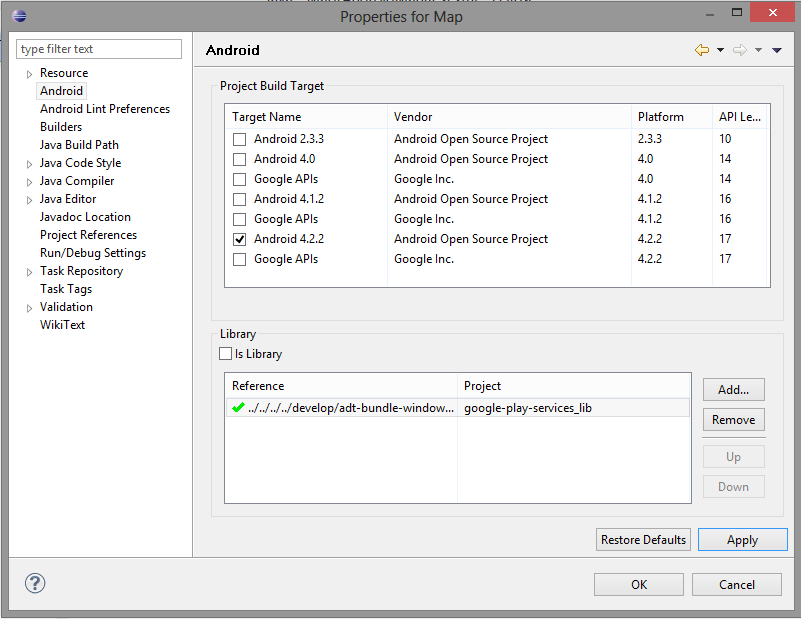
Now to use this library you would need to define a library dependency in your Android project.
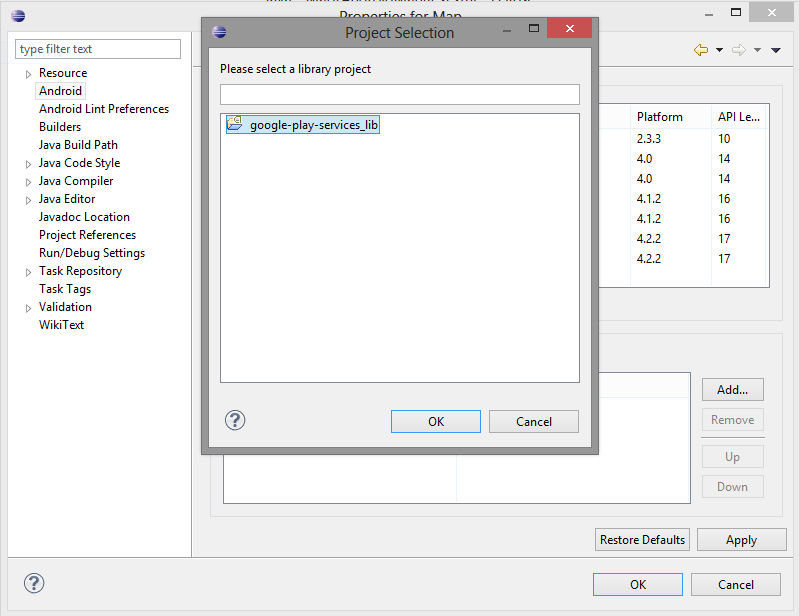
To do so right click on your Project and then Click on properties and then click on Android and then in the library window click on add and when a new window pop up click on google-play-services_lib there and click ok , now the library is imported into your project and now click on Apply and then ok.
To use Google Maps you need to create a valid Google Maps API key. The key is free, you can use it with any of your applications that call the Maps API, and it supports an unlimited number of users.
You get this key via Google APIS Console. You have to provide your application signature key and the application package name.This is based on the key with which you sign your Android application during deployment.During development with Eclipse, Eclipse automatically creates and uses a debug key.
The Eclipse debug key for signing your application can be found in the C:/users/username/.android/debug.keystore file.
Now we need to create a SHA-1 for your debug key , to do so we would need to use the keytool command from your jdk installation , now to do open cmd and go to C:\ProgramFiles\Java\jdk_version\bin and type in the following command
keytool.exe -v -list -alias androiddebugkey -keystore "C:\users\username\.android\debug.keystore"(or location of your debug.keystore file) -storepass android -keypass android
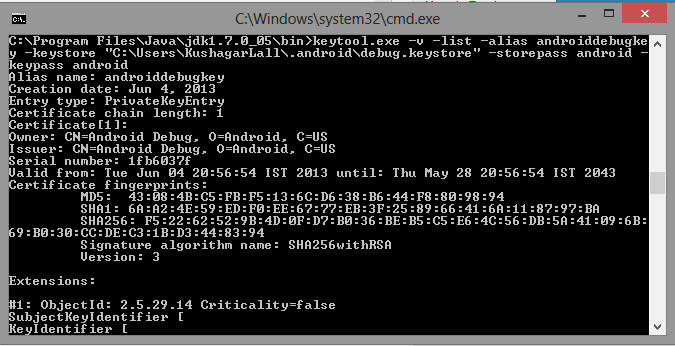
Now copy the SHA-1 output as we would need it later.
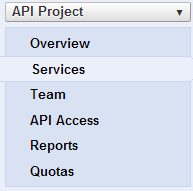
You have to register in the Google APIs Console that you want to use Google Maps for Android. You can reach this console via the following link: https://code.google.com/apis/console/ . Select here the Services entry.
And now activate the Google Maps Android API v2.

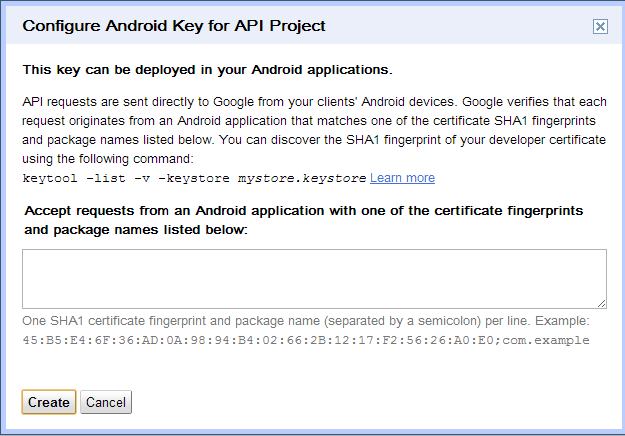
Now register your application here via the package name now to do so click on API Access and click on create new Android key ,
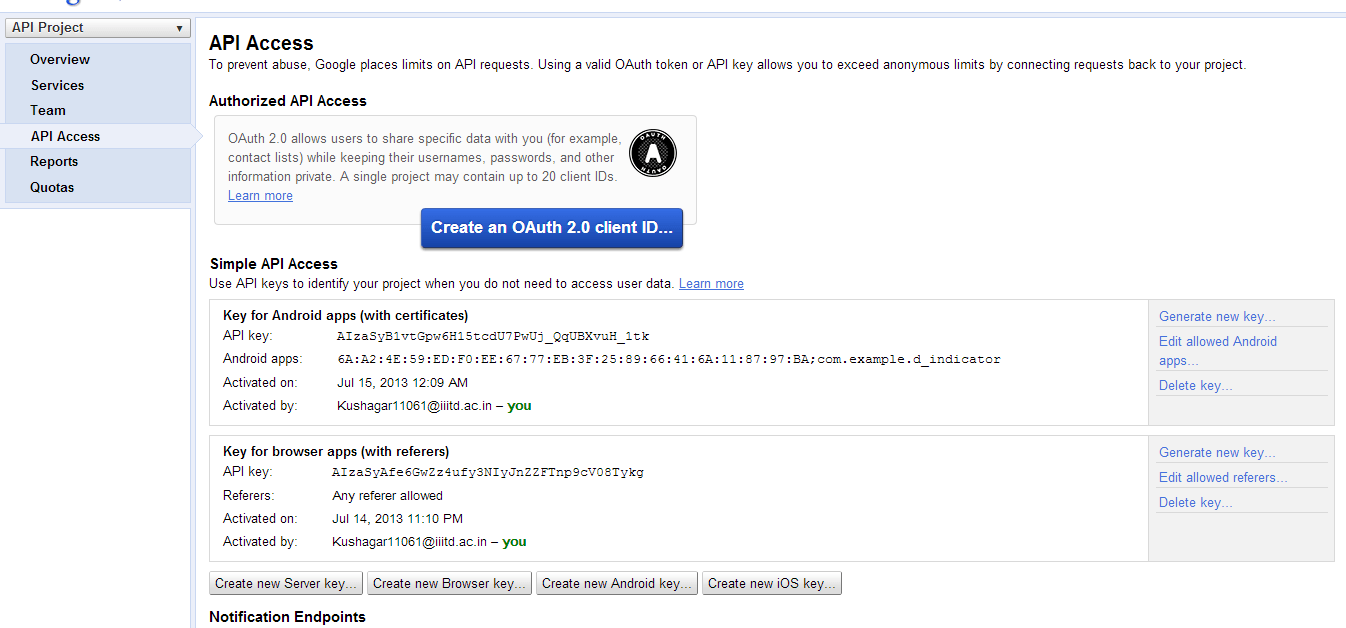
In the resulting dialog, enter the SHA-1 fingerprint, then a semicolon, then your application’s package name. For example:
BB:0D:AC:74:D3:21:E1:43:67:71:9B:62:91:AF:A1:66:6E:44:5D:75;com.example.android.mapexample
The Google APIs Console responds by displaying Key for Android apps (with certificates) followed by a forty-character API key, for example
AIzaSyBdVl-cTICSwYKrZ95SuvNw7dbMuDt1KG0Now copy and save this value you would require it in the next step.
The final step is to add the API key to your application. It goes in your application’s manifest, contained in the file AndroidManifest.xml. From there, the Maps API reads the key value and passes it to the Google Maps server, which then confirms that you have access to Google Maps data.
To add the key to your application:
In AndroidManifest.xml, add the following element as a child of the
<meta-data
    android:name="com.google.android.maps.v2.API_KEY"
    android:value="API_KEY"/>
substituting your API key for API_KEY. This element sets the key com.google.android.maps.v2.API_KEY to the value API_KEY and makes the API key visible to any MapFragment in your application.
Save AndroidManifest.xml and re-build your application.
You can find more about in here –
https://developers.google.com/maps/documentation/android/start#installing_the_google_maps_android_v2_api
Now here is the full code for Using a Map in the Android Application.
Main Activity
package com.example.map;

import android.app.Activity;
import android.os.Bundle;
import android.view.Menu;

import com.google.android.gms.maps.CameraUpdateFactory;
import com.google.android.gms.maps.GoogleMap;
import com.google.android.gms.maps.MapFragment;
import com.google.android.gms.maps.model.BitmapDescriptorFactory;
import com.google.android.gms.maps.model.LatLng;
import com.google.android.gms.maps.model.Marker;
import com.google.android.gms.maps.model.MarkerOptions;

public class MainActivity extends Activity {

    private static final LatLng JLNStadium = new LatLng(28.590401000000000000,
            77.233255999999980000);

    private GoogleMap map;

    @Override
    protected void onCreate(Bundle savedInstanceState) {
        super.onCreate(savedInstanceState);
        setContentView(R.layout.activity_main);
        map = ((MapFragment) getFragmentManager().findFragmentById(R.id.map))
                .getMap();
        Marker jln = map.addMarker(new MarkerOptions().position(JLNStadium)
                .title("JLN"));

        map.moveCamera(CameraUpdateFactory.newLatLngZoom(JLNStadium, 15));
        map.animateCamera(CameraUpdateFactory.zoomTo(10), 2000, null);
    }

    @Override
    public boolean onCreateOptionsMenu(Menu menu) {
        // Inflate the menu; this adds items to the action bar if it is present.
        getMenuInflater().inflate(R.menu.main, menu);
        return true;
    }

}
MainActivity.xml
<RelativeLayout xmlns:android="http://schemas.android.com/apk/res/android"
    xmlns:tools="http://schemas.android.com/tools"
    android:layout_width="match_parent"
    android:layout_height="match_parent"
    android:paddingBottom="@dimen/activity_vertical_margin"
    android:paddingLeft="@dimen/activity_horizontal_margin"
    android:paddingRight="@dimen/activity_horizontal_margin"
    android:paddingTop="@dimen/activity_vertical_margin"
    tools:context=".MainActivity" >

    <fragment
        android:id="@+id/map"
        android:layout_width="match_parent"
        android:layout_height="match_parent"
        class="com.google.android.gms.maps.MapFragment" />

</RelativeLayout>
AndroidManifest
<?xml version="1.0" encoding="utf-8"?>
<manifest xmlns:android="http://schemas.android.com/apk/res/android"
    package="com.example.map"
    android:versionCode="1"
    android:versionName="1.0" >

    <uses-sdk
        android:minSdkVersion="16"
        android:targetSdkVersion="17" />

    <uses-feature
        android:glEsVersion="0x00020000"
        android:required="true" />

    <permission
        android:name="com.example.map.permission.MAPS_RECEIVE"
        android:protectionLevel="signature" />

    <uses-permission android:name="com.example.map.permission.MAPS_RECEIVE" />
    <uses-permission android:name="android.permission.INTERNET" />
    <uses-permission android:name="android.permission.WRITE_EXTERNAL_STORAGE" />
    <uses-permission android:name="com.google.android.providers.gsf.permission.READ_GSERVICES" />
    <uses-permission android:name="android.permission.ACCESS_COARSE_LOCATION" />
    <uses-permission android:name="android.permission.ACCESS_FINE_LOCATION" />

    <application
        android:allowBackup="true"
        android:icon="@drawable/ic_launcher"
        android:label="@string/app_name"
        android:theme="@style/AppTheme" >
        <activity
            android:name="com.example.map.MainActivity"
            android:label="@string/app_name" >
            <intent-filter>
                <action android:name="android.intent.action.MAIN" />

                <category android:name="android.intent.category.LAUNCHER" />
            </intent-filter>
        </activity>

        <meta-data
            android:name="com.google.android.maps.v2.API_KEY"
            android:value="yourkeyvalue" />
    </application>

</manifest>
![Screenshot_2013-07-20-00-59-36[1]](https://www.sanfoundry.com/wp-content/uploads/2013/07/Screenshot_2013-07-20-00-59-361.png)
Sanfoundry Global Education & Learning Series – 100+ Java Android Tutorials.
- Apply for Computer Science Internship
- Check Programming Books
- Practice BCA MCQs
- Practice Programming MCQs
- Practice Information Technology MCQs
