Android offers an XML-driven framework to create system-style Preference Screens for your applications.
By using this framework you can create Preference Activities that are consistent with those used in both native and other third-party applications.
This has two distinct advantages:
1. Users will be familiar with the layout and use of your settings screens.
2. You can integrate settings screens from other applications (including system settings such as location settings) into your application’s preferences.
The preference framework consists of four parts:
1. Preference Screen layout — An XML file that defines the hierarchy of items displayed in your Preference screens. It specifies the text and associated controls to display, the allowed values, and the Shared Preference keys to use for each control.
2. Preference Activity and Preference Fragment — Extensions of PreferenceActivity and PreferenceFragment respectively, that are used to host the Preference Screens. Prior to Android 3.0, Preference Activities hosted the Preference Screen directly; since then, Preference Screens are hosted by Preference Fragments, which, in turn, are hosted by Preference
Activities.
3. Preference Header defi nition — An XML fi le that defi nes the Preference Fragments for your application and the hierarchy that should be used to display them.
4. Shared Preference Change Listener — An implementation of the OnSharedPreferenceChangeListener class used to listen for changes to Shared Preferences.
Unlike in the standard UI layout, preference definitions are stored in the res/xml resources folder.
Each preference layout is defi ned as a hierarchy, beginning with a single PreferenceScreen
element:
<?xml version=”1.0” encoding=”utf-8”?>
<PreferenceScreen
xmlns:android=”http://schemas.android.com/apk/res/android”>
</PreferenceScreen>
Within each Preference Screen you can include any combination of PreferenceCategory and Preference
All that remains is to add the preference controls that will be used to set the preferences. Although the specifi c attributes available for each preference control vary, each of them includes at least the following four:
1. android:key — The Shared Preference key against which the selected value will be recorded.
2. android:title — The text displayed to represent the preference.
3.android:summary — The longer text description displayed in a smaller font below the title text.
4. android:defaultValue — The default value that will be displayed (and selected) if no preference value has been assigned to the associated preference key.
MainActivity.java
package com.example.preferenceactivity1;

import android.os.Bundle;
import android.app.Activity;
import android.content.Intent;
import android.view.Menu;
import android.view.View;
import android.widget.Button;

public class MainActivity extends Activity {

    @Override
    protected void onCreate(Bundle savedInstanceState) {
        super.onCreate(savedInstanceState);
        setContentView(R.layout.activity_main);

        Button but2 = (Button) findViewById(R.id.button1);
        but2.setOnClickListener(new View.OnClickListener() {

            Intent in = new Intent("com.example.preferenceactivity1.Pref");

            @Override
            public void onClick(View v) {
                // TODO Auto-generated method stub
                startActivity(in);
            }
        });
    }

    @Override
    public boolean onCreateOptionsMenu(Menu menu) {
        // Inflate the menu; this adds items to the action bar if it is present.
        getMenuInflater().inflate(R.menu.main, menu);
        return true;
    }

}
Pref.java
package com.example.preferenceactivity1;

import android.os.Bundle;
import android.preference.PreferenceActivity;

public class Pref extends PreferenceActivity{

    @Override
    protected void onCreate(Bundle savedInstanceState) {
        // TODO Auto-generated method stub
        super.onCreate(savedInstanceState);
        addPreferencesFromResource(R.xml.prefs);
    }

}
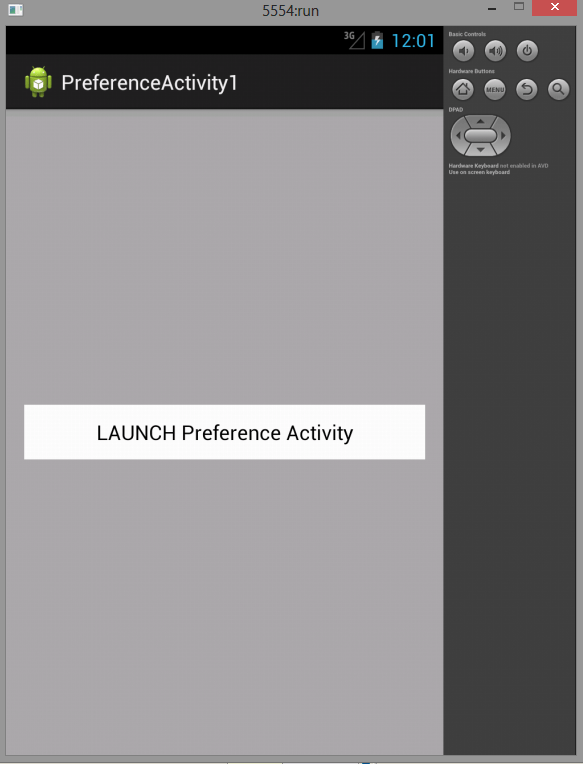
Activity_main.xml
<RelativeLayout xmlns:android="http://schemas.android.com/apk/res/android"
    xmlns:tools="http://schemas.android.com/tools"
    android:layout_width="match_parent"
    android:layout_height="match_parent"
    android:paddingBottom="@dimen/activity_vertical_margin"
    android:paddingLeft="@dimen/activity_horizontal_margin"
    android:paddingRight="@dimen/activity_horizontal_margin"
    android:paddingTop="@dimen/activity_vertical_margin"
    tools:context=".MainActivity"
    android:background="@android:color/darker_gray" >

    <Button
        android:id="@+id/button1"
        android:layout_width="wrap_content"
        android:layout_height="wrap_content"
        android:layout_alignParentLeft="true"
        android:layout_alignParentRight="true"
        android:layout_centerVertical="true"
        android:text="LAUNCH Preference Activity"
        android:background="@android:color/white"/>

</RelativeLayout>
Create a new folder in /res and name it xml and then create an xml file prefs.xml there as shown below:-
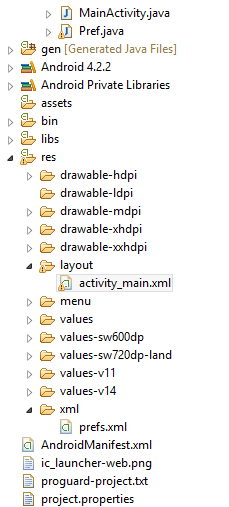
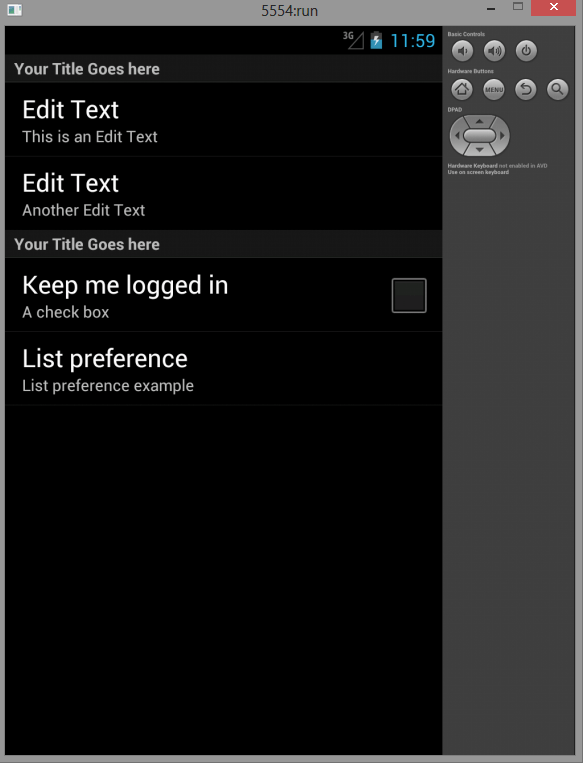
prefs.xml
<?xml version="1.0" encoding="utf-8"?>
<PreferenceScreen xmlns:android="http://schemas.android.com/apk/res/android"
    android:title="...." >

    <PreferenceCategory
        android:summary="Preference Category Screen 1"
        android:title="Your Title Goes here" >
        <EditTextPreference
            android:key="Edit Text"
            android:summary="This is an Edit Text"
            android:title="Edit Text" />
        <EditTextPreference
            android:key="Edit Text2"
            android:summary="Another Edit Text"
            android:title="Edit Text" />
    </PreferenceCategory>
    <PreferenceCategory
        android:summary="Preference Category Screen 2"
        android:title="Your Title Goes here" >
        <CheckBoxPreference
            android:key="checkBox"
            android:summary="A check box "
            android:title="Keep me logged in" />

        <ListPreference
            android:entries="@array/array1"
            android:entryValues="@array/array2"
            android:key="listpref"
            android:summary="List preference example"
            android:title="List preference" />
    </PreferenceCategory>

</PreferenceScreen>
AndroidManifest.xml
<?xml version="1.0" encoding="utf-8"?>
<manifest xmlns:android="http://schemas.android.com/apk/res/android"
    package="com.example.preferenceactivity1"
    android:versionCode="1"
    android:versionName="1.0" >

    <uses-sdk
        android:minSdkVersion="11"
        android:targetSdkVersion="17" />

    <application
        android:allowBackup="true"
        android:icon="@drawable/ic_launcher"
        android:label="@string/app_name"
        android:theme="@style/AppTheme" >
        <activity
            android:name="com.example.preferenceactivity1.MainActivity"
            android:label="@string/app_name" >
            <intent-filter>
                <action android:name="android.intent.action.MAIN" />

                <category android:name="android.intent.category.LAUNCHER" />
            </intent-filter>
        </activity>
        <activity
            android:name="com.example.preferenceactivity1.Pref"
            android:theme="@android:style/Theme.Black.NoTitleBar" >
            <intent-filter>
                <action android:name="com.example.preferenceactivity1.Pref" />

                <category android:name="android.intent.category.DEFAULT" />
            </intent-filter>
        </activity>
    </application>

</manifest>
Sanfoundry Global Education & Learning Series – 100+ Java Android Tutorials.
- Practice Information Technology MCQs
- Apply for Java Internship
- Check Programming Books
- Apply for Computer Science Internship
- Practice BCA MCQs